4-2 線上字體應用
襯線體 ( Serif ) 介紹
指的是字形筆畫末端的裝飾細節部分。

襯線:serif
無襯線:sans-serif
說明參考詳:維基百科
font-family字型順序
- 設定順序原則
-
- font-family : font1, font2, serif;
- 字型使用順序原則 font1 🡺 font2 🡺 serif 字體
- 英文在前、中文在後
-
- 例:font-family : Arial , "新細明體" ;
- Arial 這個英文字型永遠不會被使用,因 "新細明體" 已內含英文字型
- 使用機率低在前、使用機率高字型在後
-
- 例:font-family : "儷黑 Pro" , "標楷體" ;
- 由於 "標楷體" 幾乎不同類作業系統都有,而在 Mac 上專屬的"儷黑 Pro" 就沒有被執行的機會。
線上字體連結使用
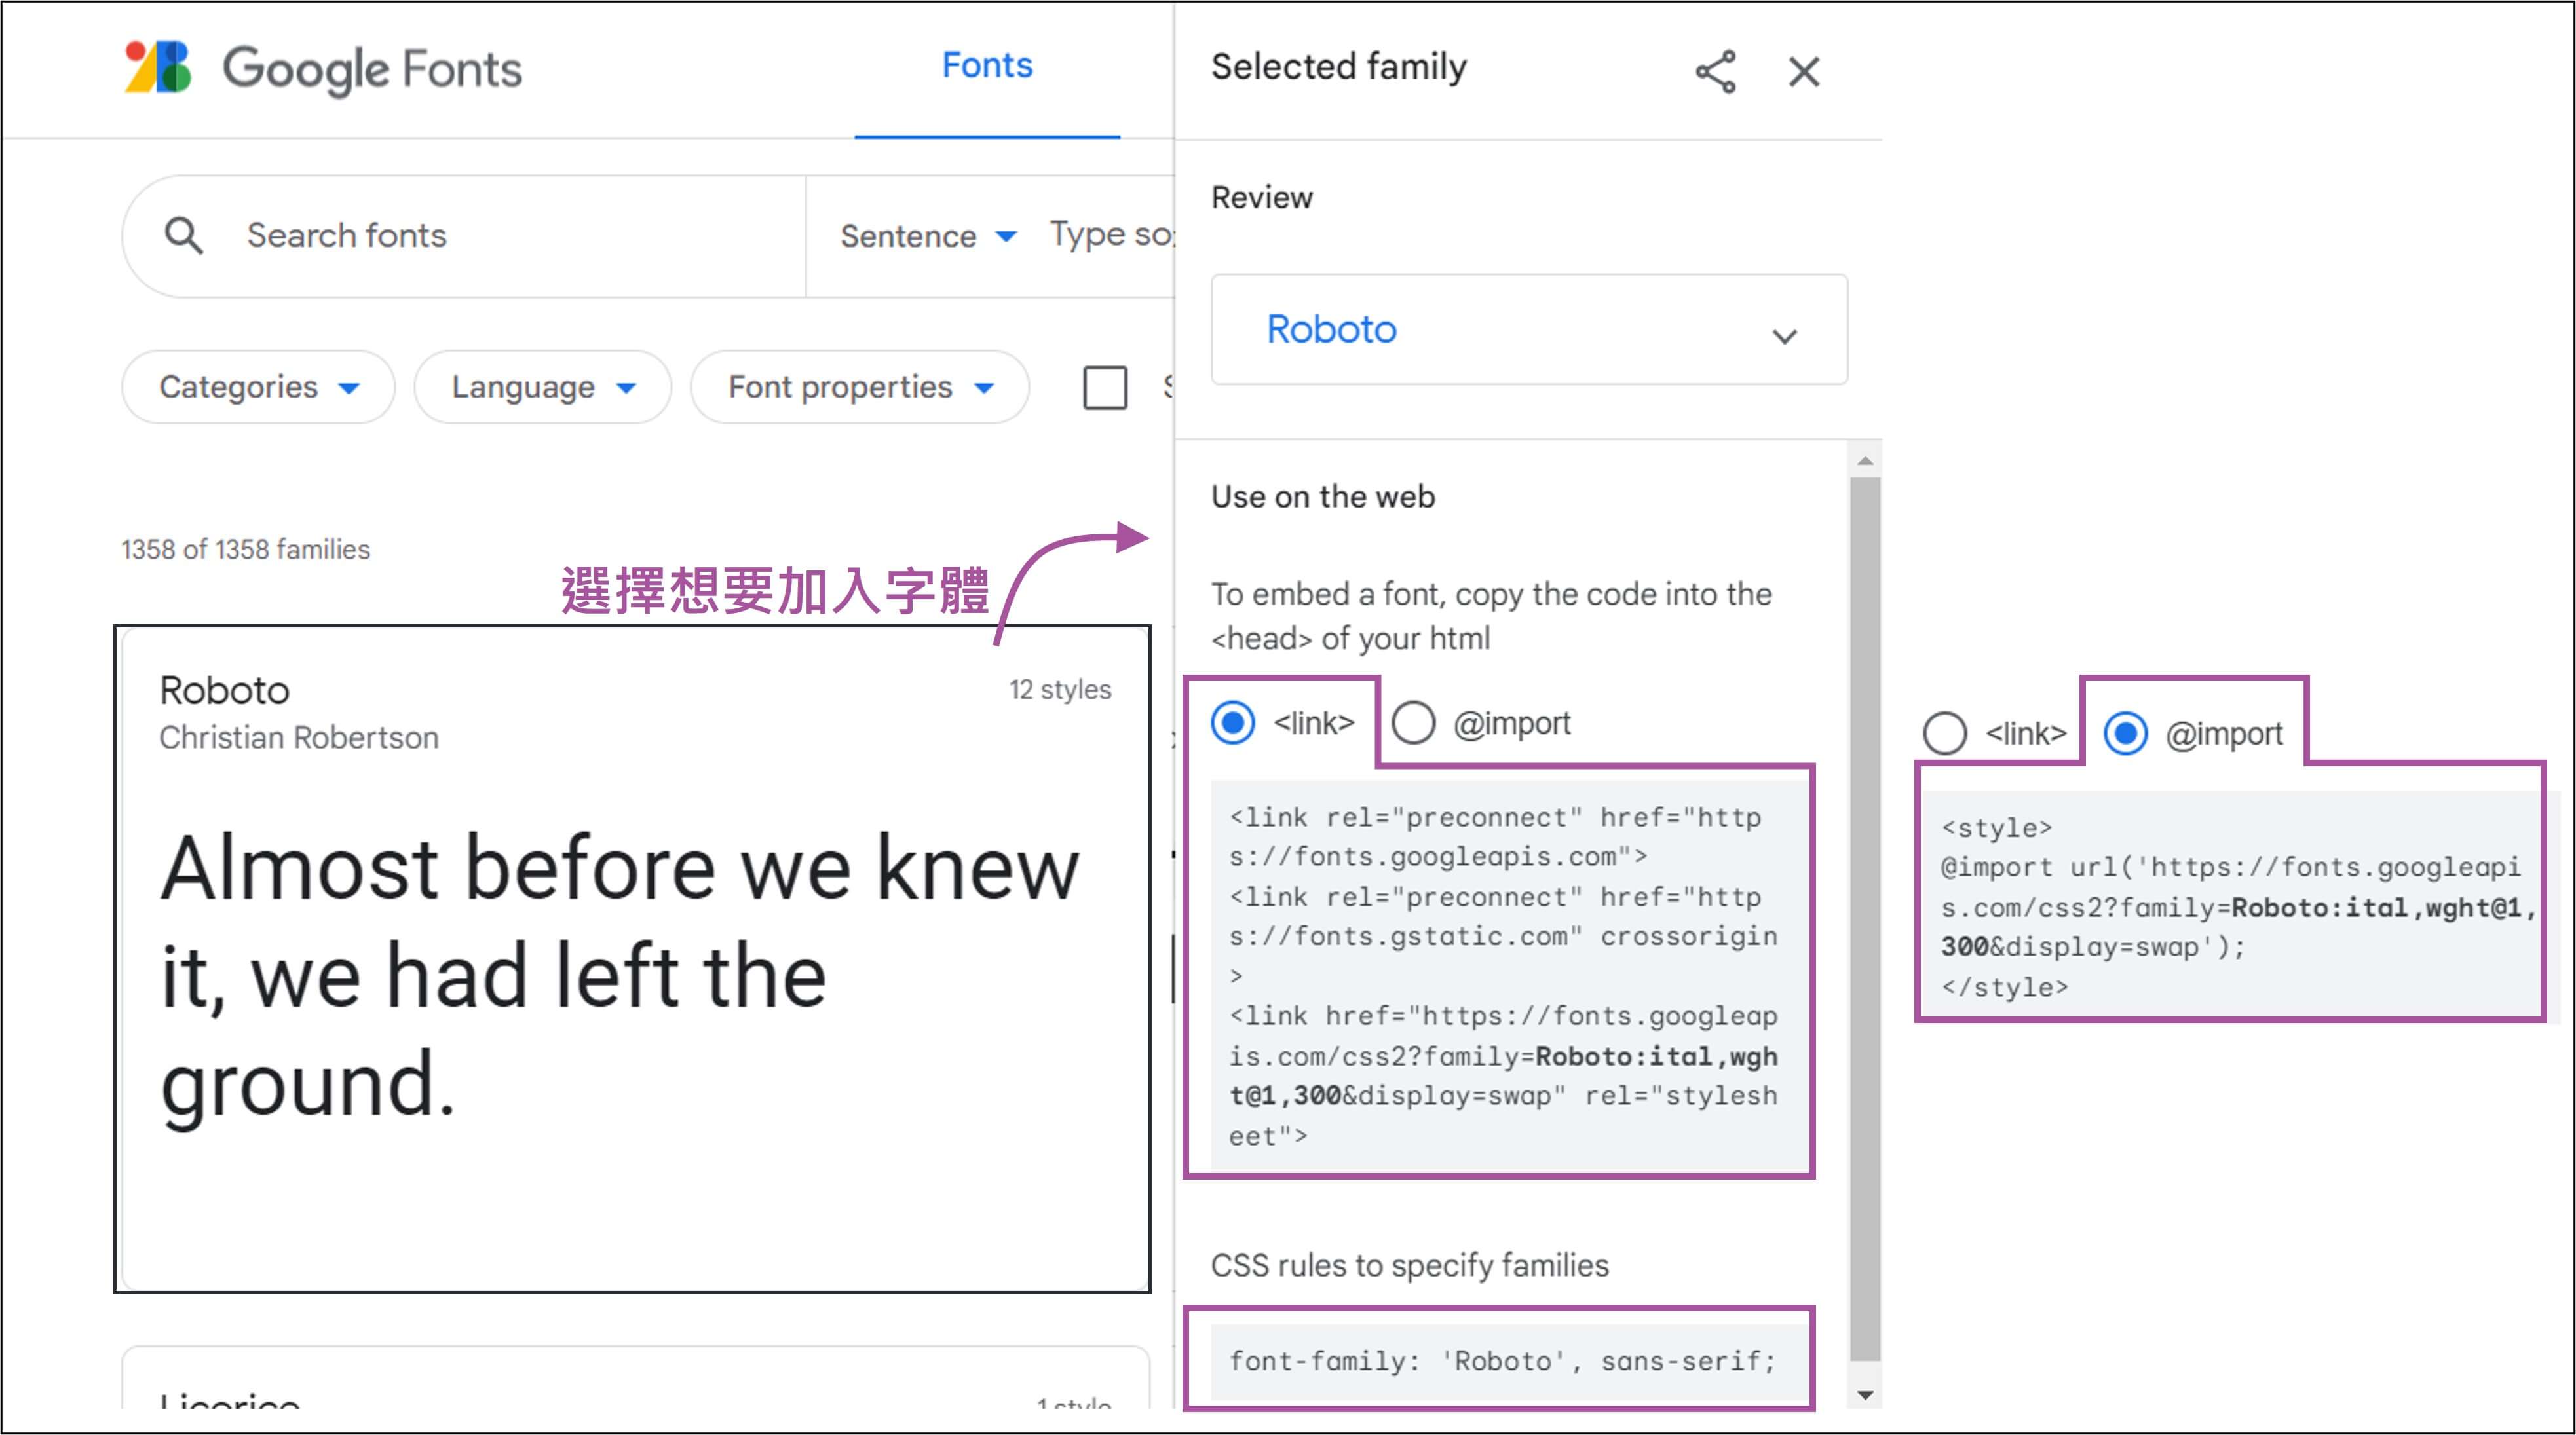
以 Google fonts為例,參考連結 Google fonts
- link 連結,置於<head></head>之間
- @import 載入,置於<style></style>之間
- 最後加入字體屬性,font-family: 字體名稱 ;
網站本地端使用字體時,@font-face 聲明
- 先使用font-face聲明字體
-
@font-face { font-family: 'MyFontFamily'; src: url('myfont-webfont.eot?#iefix') format('embedded-opentype'), url('myfont-webfont.woff') format('woff'), url('myfont-webfont.ttf') format('truetype'), url('myfont-webfont.svg#svgFontName') format('svg'); } - 在元素上CSS屬性使用該字體
-
p { font-family:"MyFontFamily", serif; } - 在頁面中使用這個字體
-
<span class="icon">i</span>
Icon Font 結合
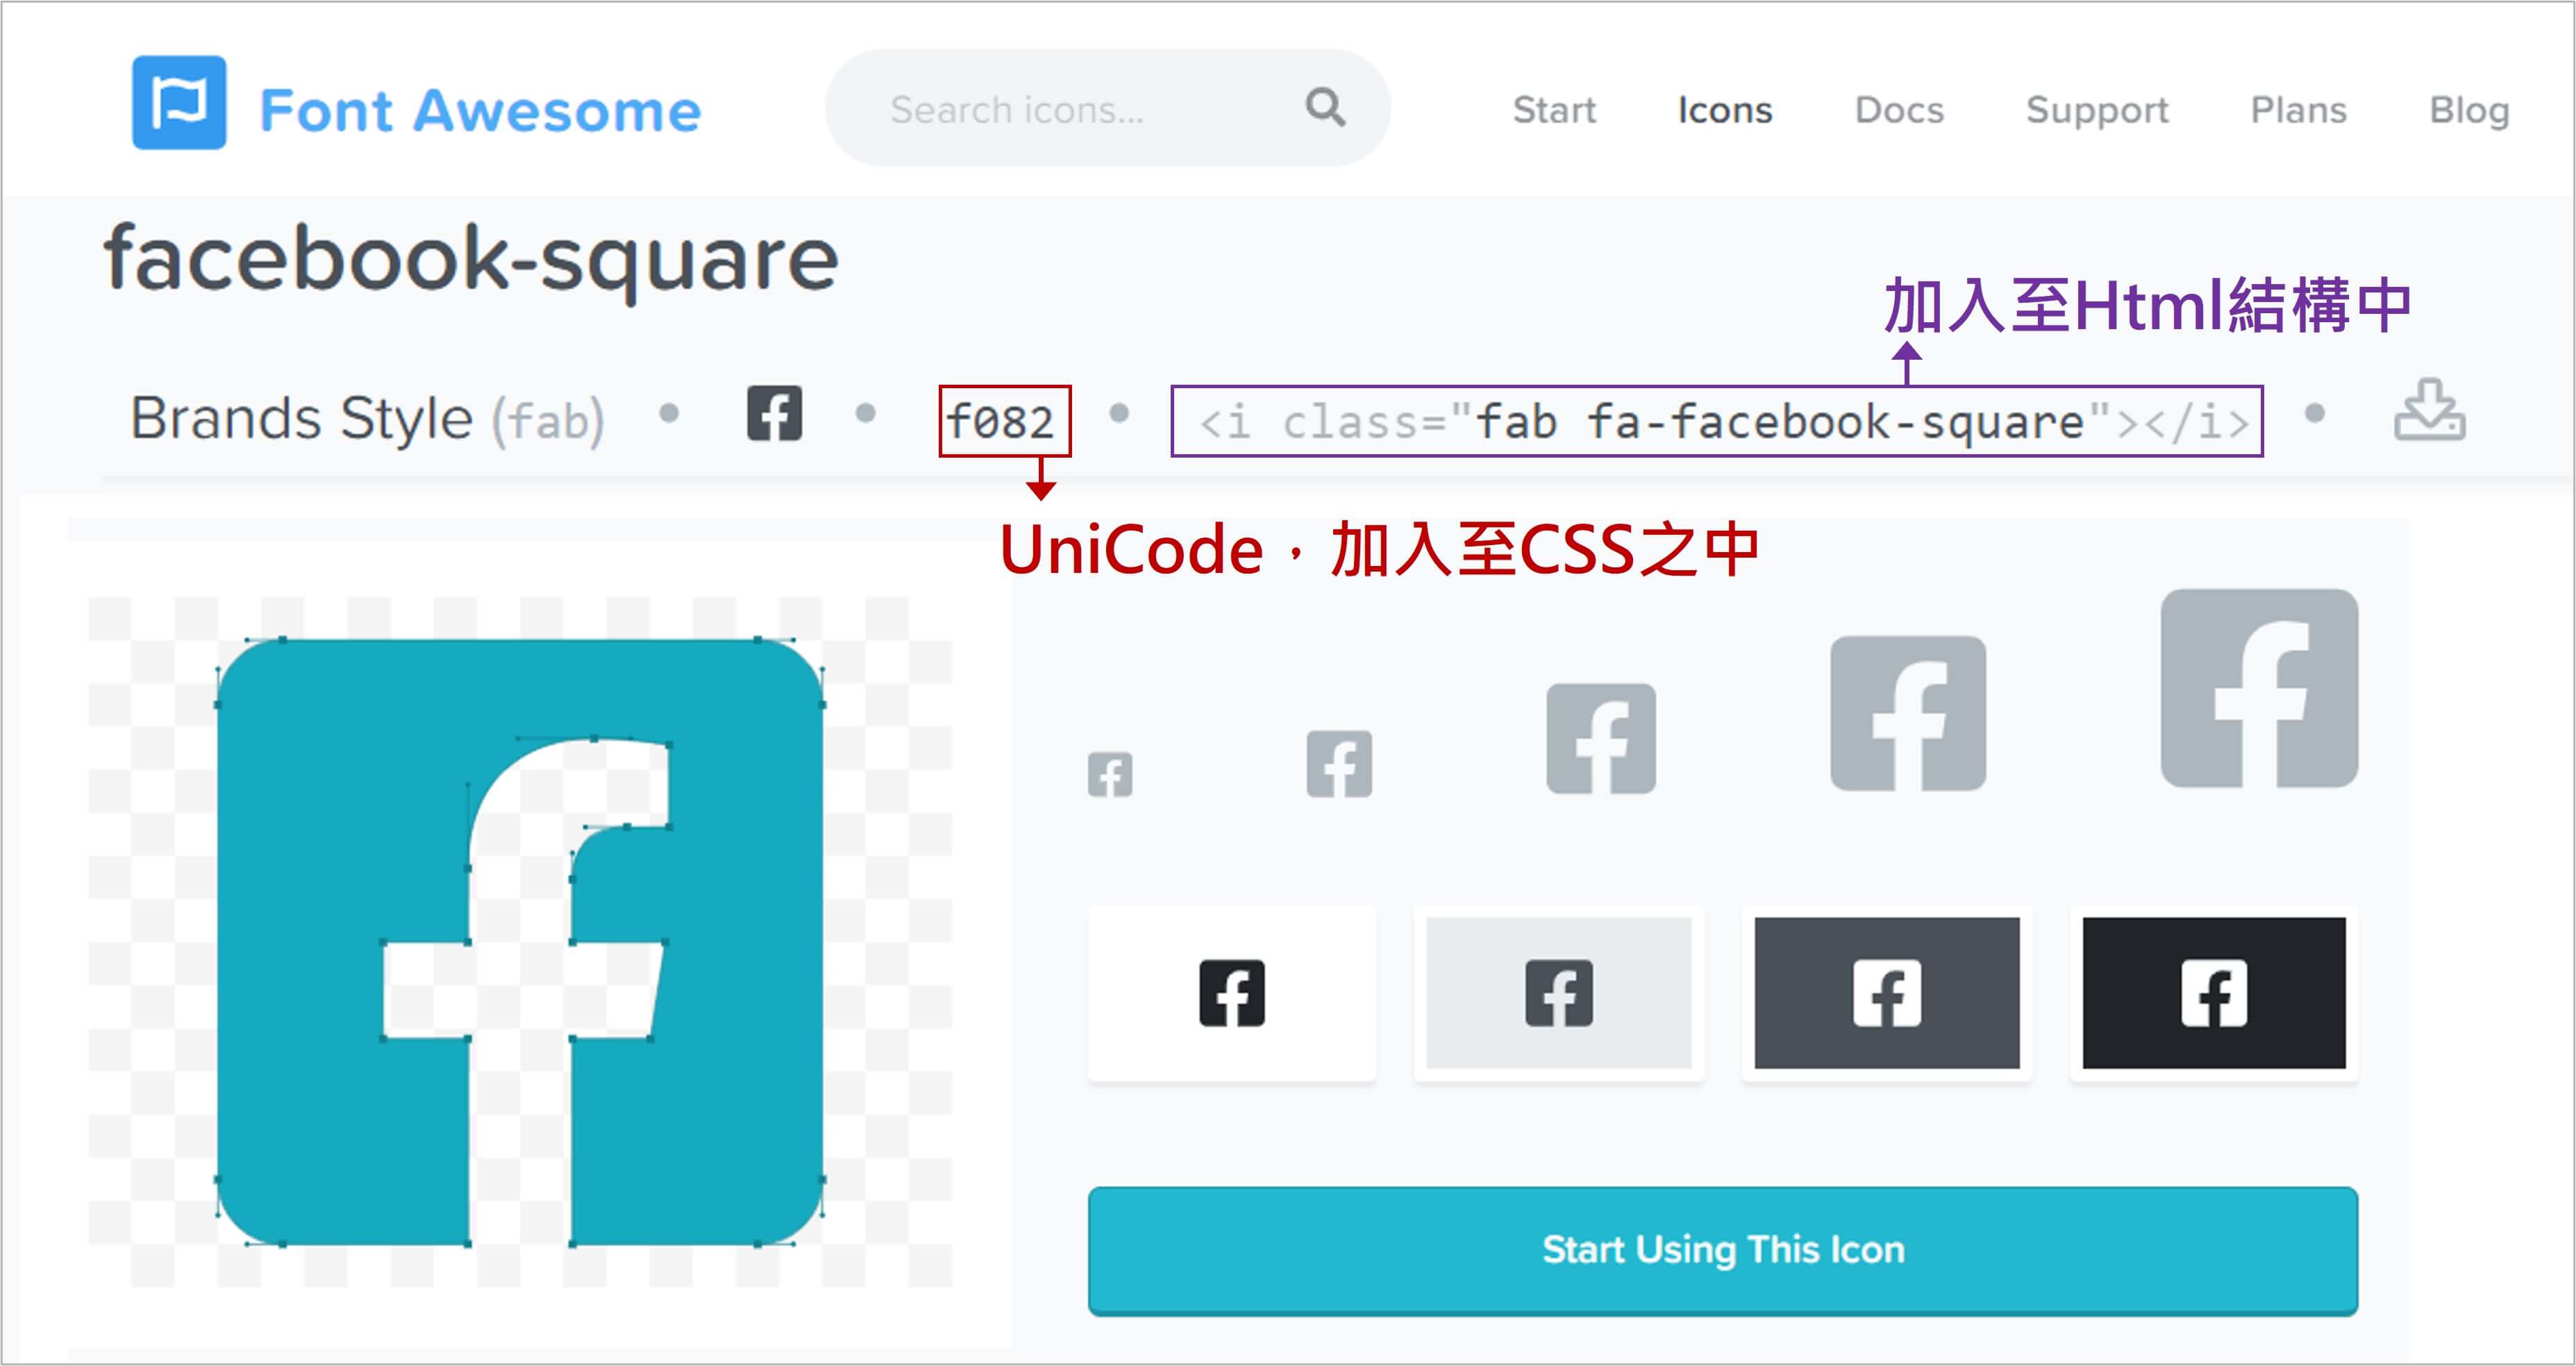
以【Font Awesome 第6版 】網站為例
Step1: 字體.css 檔案連結
利用【Google搜尋 cdnjs.com】網站為例
https://cdnjs.cloudflare.com/ajax/libs/font-awesome/6.1.2/css/all.min.css
Awesome 參考網站
1. Awesome 【各版本】資訊
2. Awesome 【第6版 下載】資訊
3. Awesome 【第6版 樣式美化設定】資訊
Awesome 樣式名稱對照表
連結參考於 【第6版 Styling with Font Awesome#Full Style Names】
| 分類 | Google翻譯 | 可用性 | 舊樣式 | 第6版後樣式名 |
|---|---|---|---|---|
| Solid | 堅硬的 | Free Plan | fas | fa-solid |
| Regular | 常規的 | Pro Plans only(部份免費) | far | fa-regular |
| Light | 光 | Pro Plans only | fal | fa-light |
| Thin | 薄的 | Pro Plans only | fat | fa-thin |
| Duotone | 雙色調 | Pro Plans only | fab | fa-brands |
| Brands | 品牌 | Free Plan | fab | fa-brands |
Step2: 查看參考網站使用介紹
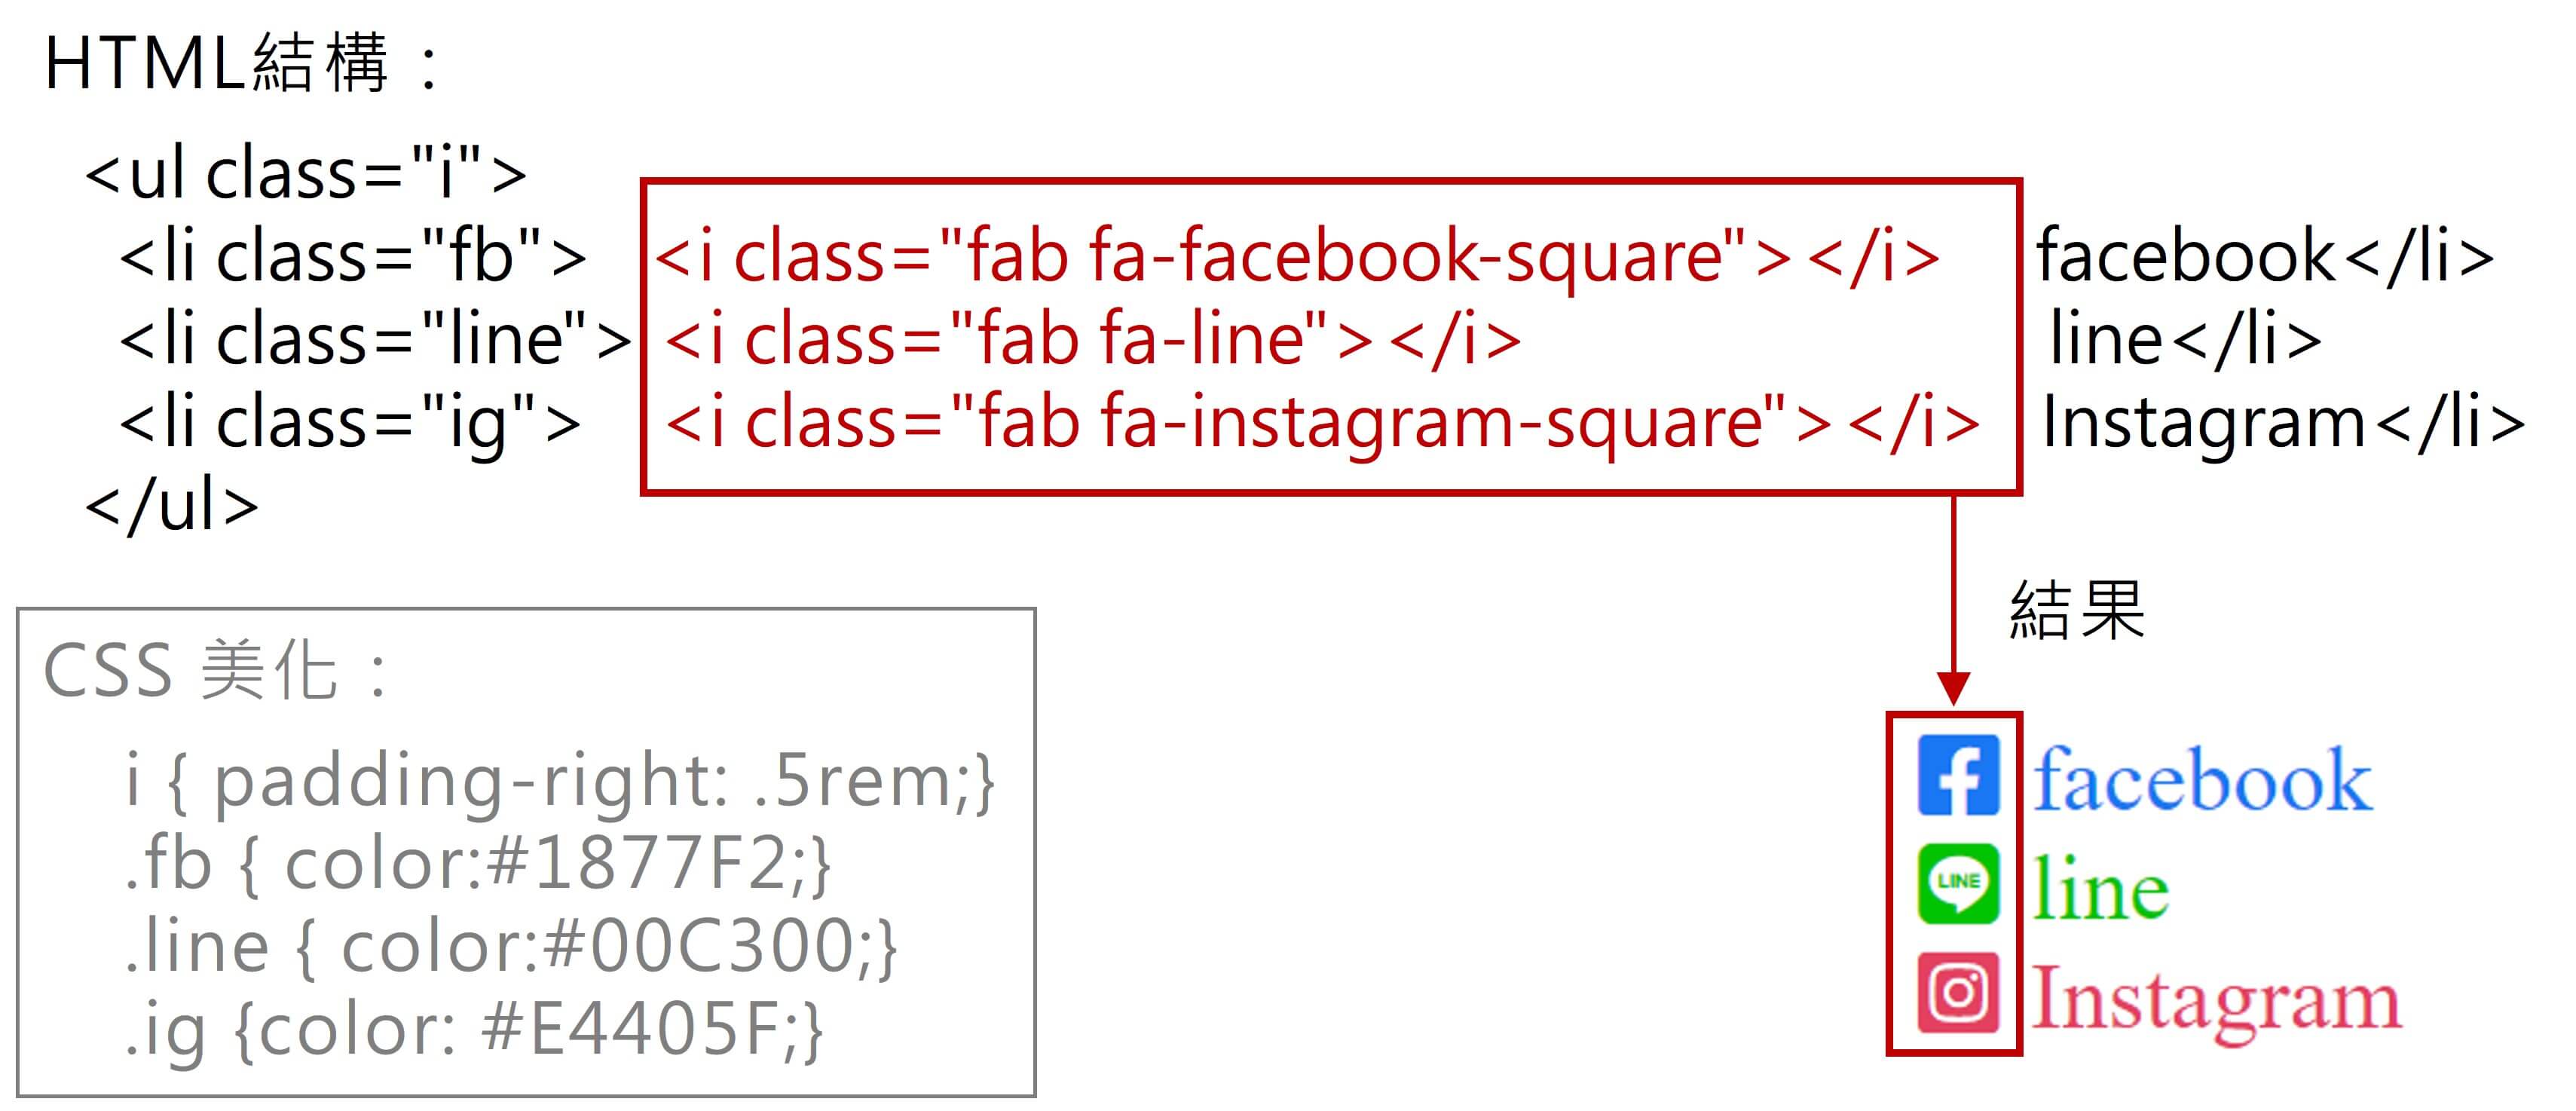
Step3-1 (方法1) : 利用 i 標籤 或者 span 標籤 加入圖示
  <head>
    <link rel="stylesheet" href="https://cdnjs.cloudflare.com/ajax/libs/font-awesome/6.1.2/css/all.min.css">
    <style>
      i{padding-right: .5rem;}
      .fb { color:#1877F2;}
      .line { color:#00C300;}
      .ig {color: #E4405F;}
    </style>
  </head>
  <body>
    <ul class="i">
      <li class="fb"><i class="fab fa-facebook-square"></i>facebook</li>
      <li class="line"><i class="fab fa-line"></i>line</li>
      <li class="ig"><i class="fab fa-instagram-square"></i>Instagram</li>
    </ul>
  </body>
Step3-2 (方法2) : 使用 unicode
- 在CSS之下
- 利用【::before】及【content: "\unicode"】方式加入
- 字體加入【font-family: "Font Awesome 6 Free";】

  <head>
    <link rel="stylesheet" href="https://cdnjs.cloudflare.com/ajax/libs/font-awesome/6.1.2/css/all.min.css">
    <style>
      .unicode li::before{
        font-family: "Font Awesome 6 Free";
        padding-right: .5rem;
      }
      .unicode .fb::before{ content:"f082"; }
      .unicode .line::before{ content:"f3c0"; }
      .unicode .ig::before{ content:"e055"; }
    </style>
  </head>
  <body>
    <ul class="unicode">
      <li class="fb">facebook</li>
      <li class="line">line</li>
      <li class="ig">Instagram</li>
    </ul>
  </body>